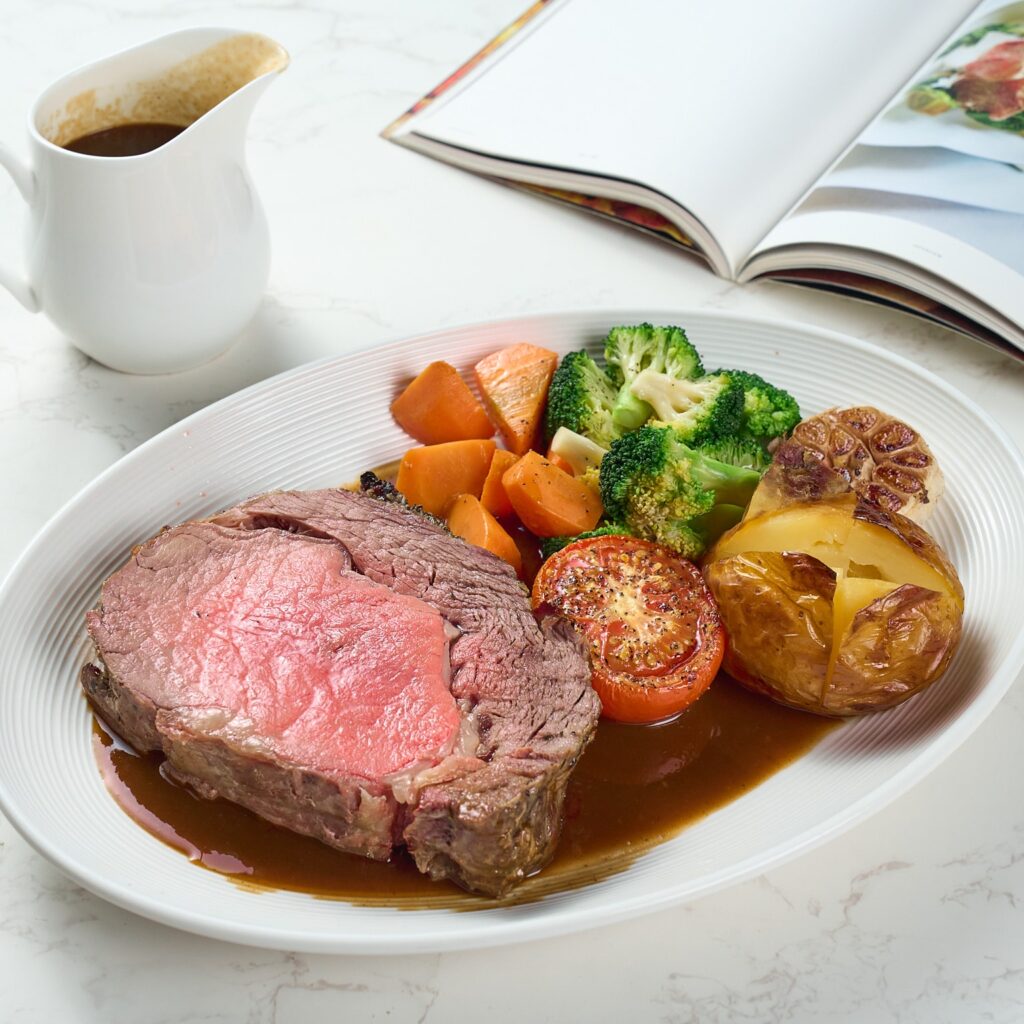
A classic roast beef is capable of elevating any meal from Sunday dinners to special celebrations. While the process of making roast beef might appear daunting, with the right cut, seasoning, and method, it can be a simple and massively rewarding recipe with which to train oneself.
So if you want your roast well done or with a juicy medium-rare center, the following guide will provide some pro tips and a sure-shot recipe that will help you end up with perfect roast beef every single time!
Best Cut for Roast Beef
Making the perfect roast beef starts with selecting the cut of beef. The choice will determine the texture and flavor of your roast, so choose accordingly to your liking.
- Top Sirloin Roast: The top sirloin is a lean cut, with great flavor and tenderness if cooked correctly. Slightly cheaper than the prime varieties like rib-eye, it gives excellent results.
- Rib Roast: Also known as prime rib, it’s all about marbling-tender and flavorful. It is one of those cuts for the finest of occasions, giving showmanship and a melt-in-your-mouth texture.
- Chuck Roast: The cheaper option of chuck roast would be perfect for slow roasting or braising. This one has a bit of fat and connective tissue in it, which, after a long, slow cook, becomes flavorful and juicy.
- Round Roast: Another cheaper cut is the round roast, which is leaner, but in this case, overcooking can lead to toughening. Best taken to medium, if not medium-rare, in doneness to ensure tenderness.
- Eye of Round Roast: If you do want a leaner roast, eye of round is your best choice. It can be a bit tough, so ideal for slow roasting.
Roast Beef Cooking and Internal Temp Guide
Getting roast beef right isn’t just about oven time—it’s about internal temperature. A thermometer is your best friend here, making sure you hit the exact doneness you want.
Follow this step-by-step process for foolproof results:
- Preheat & Prep: Choose your preferred doneness, then press the Start Cooking button. The oven will preheat automatically. When you hear the sound prompt, place the beef on the sheet pan in the third rack layer.
- Initial Cooking Stage: As the beef cooks, the oven monitors the internal temperature. Once it reaches 77°F / 25°C (about 25 minutes in), rotate the FUNCTION knob and lower the oven temperature to 320°F / 160°C. This gentle heat ensures even cooking.
- Cook to Target Temperature: Continue cooking until the beef reaches your desired doneness. Here’s a quick temperature guide to follow:
| Doneness | Min Temp (°F) | Max Temp (°F) | Recommended Temp (°F) | Notes |
| Rare | 110 | 120 | 115 | Very red center, very juicy |
| Medium-rare (Chef’s choice) | 121 | 126 | 125 | Warm red center, tender and juicy |
| Medium | 127 | 135 | 130 | Pink center, balanced texture |
| Medium-well | 136 | 145 | 140 | Slightly pink, firmer bite |
| Well-done | 146 | 157 | 150 | Fully cooked through, little to no pink |
- Rest Before Serving: Once your roast reaches the recommended temperature, remove it from the oven and rest for 3 minutes. This allows the juices to redistribute for maximum tenderness.
Best Oven for Roast Beef
If you want roast beef that is tender, juicy, and cooked perfectly every single time, the oven has to rank right up there with the cut of beef itself. Regular ovens can do it, but heat tends to be inconsistent, cooking takes too long, and the exact temperature needs to be checked frequently.

The First Countertop Oven with a Wireless Thermometer
That’s where the Typhur Sync Oven stands out. It is designed to remove the stress and uncertainty from roasting:
- Built-in wireless thermometer: Tracks internal temperature with pinpoint accuracy, so you know exactly when your beef has reached its ideal doneness.
- Cook faster: Heat circulation generated by the two heating elements and 2400 RPM fast fan can be 30% faster than any usual heat source.
- Big capacity: Roast on two levels side-by-side with a 6 lb beef joint or top it off with a 12″ pizza or even 2 lbs of wings. Worthy of family dinner or a gathering.
- 12-in-1 versatility: Roast, Bake, Air Fry, Toast, Dehydrate, Proof, Broil, and more—all in a single countertop oven.
- Juicier results: With precise temperature monitoring, you’ll never overcook or dry out your beef again.
For an oven that is smarter, faster, and more dependable than others, the Typhur Sync Oven is the perfect choice for roast beef. It combines the exactness of a professional kitchen with the matter-of-factness that casual home cooks require so that every piece of roast beef turns out perfect.
Expert Tips for Perfect Roast Beef
The gradation of roast beef involves several tips. From the carving of the beef itself to the style of dressing, here are those easy steps to do for that perfect roast every time:
Bone-In vs. Boneless Roast
Since the bone acts as insulation, bone-in roasts generally require a little longer to finish cooking in the oven compared to boneless ones. When you do the bone-in roast beef, make the necessary allowances for adequate time so that the heat thoroughly penetrates the meat.
Adding Fat for Moisture and Flavor
If you have a lean cut, it may be a good idea to add some fat to keep the roast beef juicy and tasty. A simple way is to rub the roast with butter or olive oil before cooking. For added flavor, place a few slices of bacon on top of the roast-the bacon will keep it moist and form into a nice-crisp crust!
For those who want precision in both temperature and cooking time, the Typhur Sync Oven provides the perfect solution. It allows you to monitor the roast remotely and maintain consistent heat, ensuring perfect doneness every time.

Resting the Meat for Juiciness
Take the roast beef from the oven as soon as it hits the desired temperature. At this point, let it sit for 3 minutes before serving. This time is important for the juices to redistribute into the meat, thus guaranteeing a juicy and tender roast.
By following these expert tips, you’ll be able to consistently cook a roast beef that’s flavorful, juicy, and cooked to perfection every time.
Frequently Asked Questions
If stored inside an airtight container correctly, the cooked beef roast can stay in the fridge for 3-4 days. The cooked dish should be refrigerated within two hours from the time of cooking to rule out any risk of foodborne illness.
Leftover roast beef is often really flexible. It can be thinly sliced for sandwiches, shredded for tacos or burritos, or dumped into any soup or stew you have around. It can also be cooked into a beef hash or tossed on a salad to make a hearty meal for the next day.
Yes, dogs can have roast beef, but only in moderation, and it must never be seasoned with garlic, onions, or unusually high amounts of salt, as these can all be harmful to dogs. Plain, cooked beef is okay for dogs and can serve as a good protein source.
Summary
A good roast beef should be simple to make. Pick the right cut of meat, follow practical advice, and maybe the best roast beef recipe to serve to your family and guests. A tender prime rib or a lean top sirloin–from there on, prep and cooking techniques are key for perfect roast beef.
Prime Rib
Equipment
- Oven Gloves
- Bowl
The First Countertop Oven with a Wireless Thermometer
Ingredients
- 6 pounds Standing Rib Roast
- 1/4 cup Olive Oil
- 3 Garlic Clove finely chopped
- 1 tbsp Fresh Rosemary Leaves chopped
- 1 tbsp Fresh Thyme Leaves chopped
- 6 tsp Kosher Salt
- 1 tbsp Crushed Black Pepper
Instructions
- In a small bowl, combine oil, garlic, rosemary, thyme, salt, and pepper.1/4 cup Olive Oil, 3 Garlic Clove, 1 tbsp Fresh Rosemary Leaves, 1 tbsp Fresh Thyme Leaves, 6 tsp Kosher Salt, 1 tbsp Crushed Black Pepper
- Apply the seasoning evenly on the surface of the beef.
- Insert the probe into the thickest portion of the beef, making sure the safety notch is completely inside the food.
- Press the “Start Cooking” button to start preheating. Once preheated, place the beef on the roasting pan and insert it into Level 1. This high-temperature stage helps form a flavorful crust on the meat.
- Select your preferred doneness, lower the oven temperature to continue cooking. The unit will beep when the beef reaches the target temperature.
- Using oven gloves, carefully remove the roasting pan with the beef and transfer it to a heat resistant surface. Let the beef rest for at least 3 minutes. (The internal temperature will continue to rise.)
- Carefully remove the probe.
- Slice the beef and serve with any side dishes you like.
Nutrition
(Nutrition information is calculated automatically by Spoonacular API and should be considered an estimate.)


