Love at first bite: crafting love with these customized heart cookies that’ll make every moment sweeter.

These cookies boast a tantalizing blend of soft, thick centers and slightly crisp edges, all dressed in royal icing for that extra special touch.
While these cookies draw inspiration from conversation heart candies, you won’t need a bag of them to start. Just grab a rolling pin, a heart-shaped cutter, and a dash of creativity for your messages.
These charming confections make a perfect gift for Valentine’s Day and Mother’s Day, adding a touch of sweetness to these special occasions.
Table of contents
Why We Love This Recipe
- Perfect Texture: Soft and thick in the center with just the right amount of crispiness around the edges.
- Delectable Flavor: A mouth-watering buttery vanilla taste that’s simply irresistible.
- Simple Ingredients: Made with everyday ingredients found in most kitchens.
- Versatile: Enjoy them plain or get creative by adding your favorite extracts for extra flavor.
- Shape Retention: They hold their shape beautifully while baking, ensuring those cute heart designs stay intact.
- Freezer-Friendly: These cookies freeze exceptionally well, so you can enjoy them anytime.
- Easy Recipe: The recipe is easy to follow, making it suitable for both novice and seasoned bakers.
Get another cookie recipe for Mother’s Day and Valentine’s Day: Rose cookie recipe.
How to Make Heart Cookies
A full printable version of this recipe with ingredient measurements is available at the bottom of this post.
1. Make cookie dough
- Mixing. You only need 7–8 ingredients. So, be sure to follow your specific recipe for the best results. Preparing your cookie dough usually involves creaming butter and sugar, then adding eggs and flavorings like vanilla or almond extract. Dry ingredients like flour, baking powder, and a pinch of salt are mixed in last. Once your dough is ready, you might need to chill it in the refrigerator for at least 2 hours and up to 2 days. This helps to roll out evenly.
- Roll out cookie dough. Roll the dough out to a thickness of 1/4 inch. (Please ensure the thickness of the dough, cookies that are too thin will easily be damaged during the cooking process.) Refrigerate or freeze the dough for a while (about 20 minutes) until it is easy to cut.
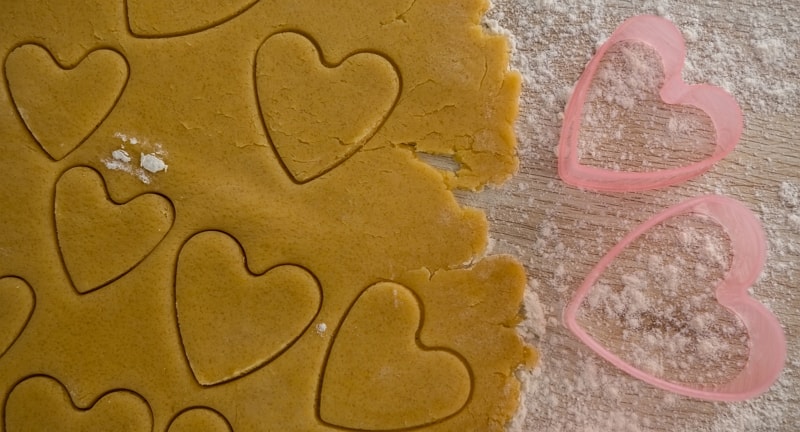
- Cut out the heart shapes. Remove the chilled dough from the refrigerator. Use cookie cutters to cut out the desired shapes. Return the cookies to the refrigerator to firm up for approximately 15-20 minutes. Roll out the remaining dough scraps and repeat the process with the other portion of dough.

2. For the icing
Combine the confectioners’ sugar and pasteurized egg whites in a mixer, blending at a medium speed. Slowly introduce water into the mixture, adjusting consistency to your preference. Add the finished icing to a bowl. Add an appropriate amount of food coloring and mix well. You can choose and adjust the color to your liking. Once achieved, transfer the icing to a piping bag and set it aside for later use.
3. Roast & cool
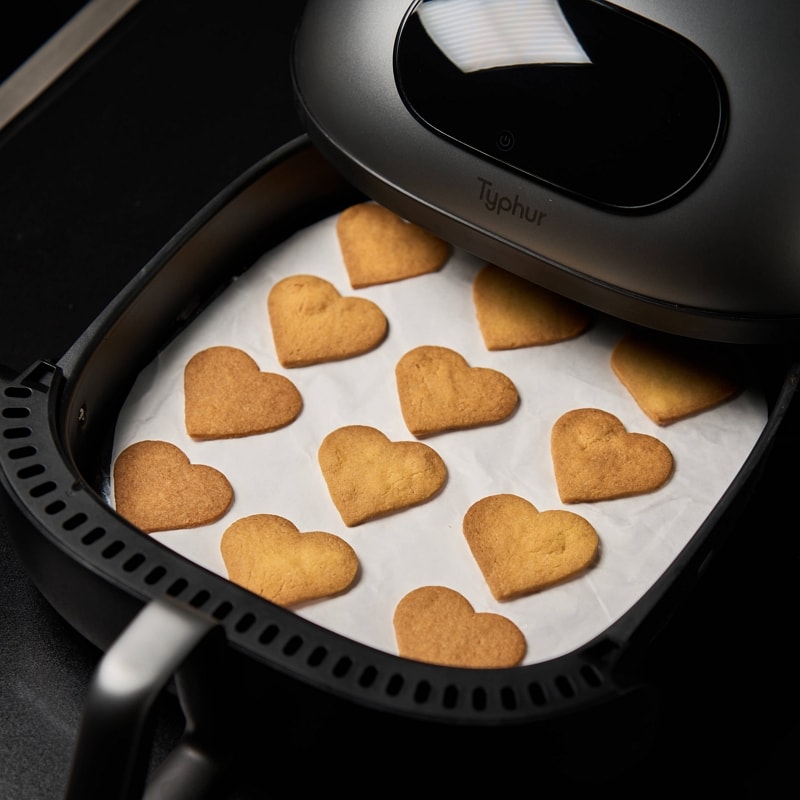
I’ve found that using an air fryer to bake these beautiful heart-shaped cookies is more efficient than a traditional oven. Simply choose the “Roast” mode, set the temperature to 330°F, and bake for only 15 minutes.
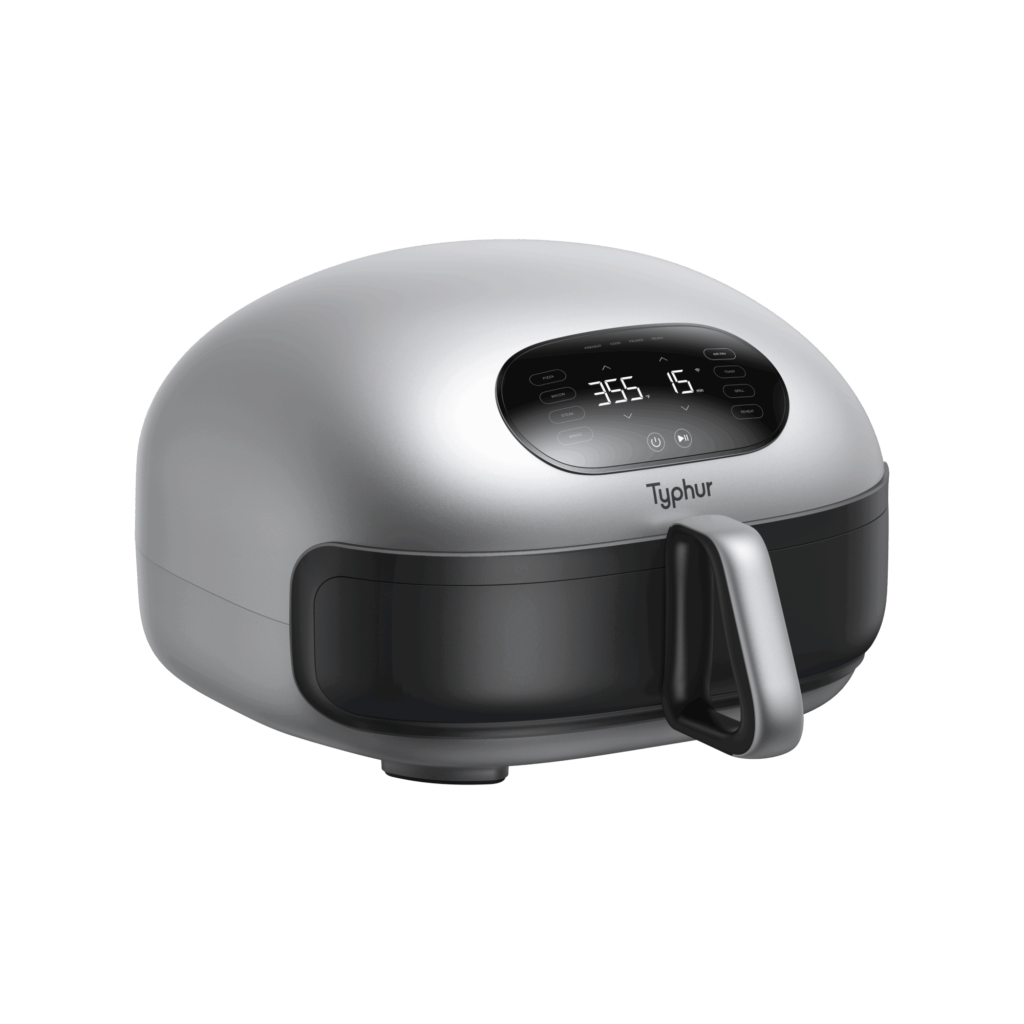
Moreover, the innovative Typhur Dome air fryer is tailored for an optimal baking and cooking experience, it offers:
Large Capacity: This air fryer boasts a generous cooking space, allowing you to air fryer up to 32 chicken wings in a single layer. This feature is perfect for preparing large batches of cookies without the need to cook in multiple rounds.
Unmatched Speed: The Typhur Dome offers the fastest cooking speed. This means your cookies will be ready in no time, perfect for those last-minute baking sessions.

Effortless Cleanup: The air fryer’s unique Self-Cleaning Mode is a game-changer, simplifying the post-baking cleanup process. Plus, its dishwasher-safe components make it even more convenient to maintain.
App Integration: The ability to monitor and control the cooking process through an app connection adds a layer of convenience and precision. You can keep an eye on your cookies’ progress without having to constantly open the air fryer.
Whisper-Quiet Operation: One of the most appealing features is its whisper-quiet operation. This means you can air fryer early in the morning or late at night without disturbing the peace in your home.

Dual Heating Elements
4. Decorate
Snip a small opening in your icing-filled piping bag. Use it to outline and embellish the surface of your cookies. Alternatively, you can decorate them with your favorite candies.
Cooking Tricks for Heart Cookie Recipes
For a flawless outcome with your cookie recipes, here’s a handy cooking trick to keep in mind:
- Chill the Cookie Dough: It’s crucial to refrigerate the cookie dough. This step is not just a formality; chilling solidifies the fat in the cookie dough, preventing your cookies from spreading too much while baking and ensuring they hold their heart shape perfectly.
- Roll on Silicone Baking Mats or Parchment Paper: For an even easier baking experience, roll out your cookie dough directly on silicone baking mats or parchment paper sheets. This approach not only helps in achieving a uniform thickness but also makes transferring the dough to the baking sheet a breeze, significantly reducing the risk of misshaping the cookies. Plus, it’s a great way to keep your work surface clean!
These tricks are also helpful for gingerbread cookies and all homemade cookies.

Air Fryer Valentine’s Day Heart Cookies
Equipment
- Tongs
- Mixing Bowl
- Cookie Cutter
- Stand Mixer
- Piping Bag
- Rolling Pin
Ingredients
For the Cookies
- 9.4 oz Unsalted Butter
- 1 cup Granulated Sugar
- 1 Large Egg
- 1 tbsp Vanilla Extract
- 1/4 tsp Baking Soda
- 1/2 tsp Salt
- 3 cup All Purpose Flour
For the lcing
- 1 Egg White Pasteurized
- 8.9 oz Confectioners Sugar
- 1 tbsp Water
- as needed Red Food Coloring, optional
Instructions
- In a large bowl, sift together the flour, baking soda, and salt. In a stand mixer fitted with a paddle attachment, cream the butter and sugar on medium speed until light and fluffy. Add the egg, cream, and vanilla extract to the mixer and mix until well combined. Scrape down the sides of the bowl and mix again to ensure all ingredients are thoroughly combined. Gradually add the dry ingredients to the mixer and continue to blend until a consistent dough forms. Wrap the dough in plastic wrap and chill in the refrigerator for 3 to 4 hours before baking.9.4 oz Unsalted Butter, 1 cup Granulated Sugar, 1 Large Egg, 1 tbsp Vanilla Extract, 1/4 tsp Baking Soda, 1/2 tsp Salt, 3 cup All Purpose Flour
- Combine the confectioners’ sugar and pasteurized egg whites in a mixer, blending at a medium speed. Slowly introduce water into the mixture, adjusting consistency to your preference. Add the finished icing to a bowl. Add an appropriate amount of food coloring and mix well. You can choose and adjust the color to your liking. Once achieved, transfer the icing to a piping bag and set it aside for later use.1 Egg White, 8.9 oz Confectioners Sugar, 1 tbsp Water, as needed Red Food Coloring, optional
- Prepare two sheets of baking paper on your work surface. Take a suitable amount of dough and place it between the two sheets of baking paper. Using a rolling pin, roll the dough out to a thickness of 1/4 inch. Refrigerate or freeze the dough for later use. (Please ensure the thickness of the dough, cookies that are too thin will easily be damaged during the cooking process.)
- Remove the chilled dough from the refrigerator. Use cookie cutters to cut out the desired shapes. Place the cut-out cookies on a baking sheet. Cover the baking sheet and return the cookies to the refrigerator to firm up for approximately 15-20 minutes. Roll out the remaining dough scraps and repeat the process with the other portion of dough.
- Remove the basket from the Typhur Dome. Line the bottom of the basket with a layer of aluminum foil. This will help the cookies maintain a better shape during baking. On top of the aluminum foil, line a layer of parchment paper. This will prevent the cookies from sticking.
- Carefully place the cookies in the cooking tray. Return the tray to the Typhur Dome.
- Bake the cookies.Temperature: 330 °F Time: 15 minutes
- Remove the cookies from the tray.
- Snip a small opening in your icing-filled piping bag. Use it to outline and embellish the surface of your cookies. Alternatively, you can decorate them with your favorite candies.
Nutrition PER SERVING
(Nutrition information is calculated automatically by Spoonacular API and should be considered an estimate.)


What does it mean by Bake 330 degrees. Is that on Air Fry or Roast?
Firstly, I apologize for any confusion caused by not specifying the cooking mode in the recipe. When referring to “Bake at 330°F,” for making cookies in a Dome air fryer, you should use the “Roast” mode. Setting your air fryer to 330 °F for 15 minutes in this mode ensures that the cookies are heated evenly, achieving a perfectly baked texture that’s both cooked through and soft. Thank you for your comment, and I hope this clears up any confusion. Enjoy your baking!
Please clarify. In your answer to Bob, you instructed him to use the ‘toast’ mode. in the instructions contained within the recipe, it instructs the cook to choose ‘roast’. which is best mode?
Also, does one take out the pierced tray from the basket or place foil and parchment paper on top of the pierced tray in the basket?
Thank you.
I am loving my new Typhur, which I have been using for only 48 hours, but have made several items in it already. I am experimenting with baking.
Catie B
Hi Catie, you should indeed use the ‘Roast’ mode as indicated in the recipe instructions. I apologize for any confusion caused by the discrepancy in my previous instructions. Thank you for choosing Typhur Dome. Happy cooking!