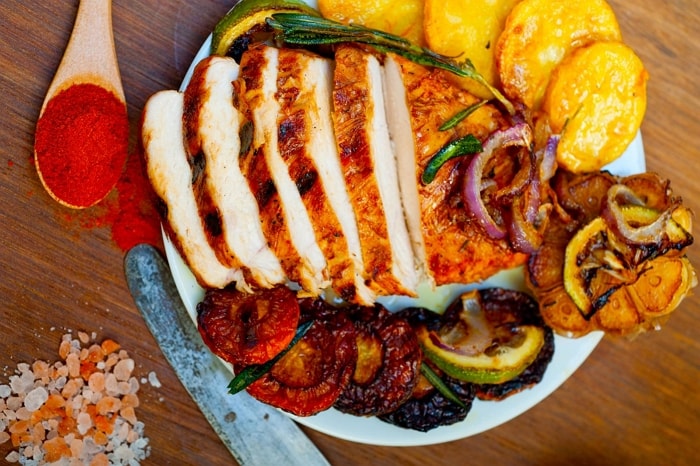
Hello, fellow BBQ lovers and home cooks! We all know there’s nothing quite like the tantalizing aroma of smoked ribs wafting through the backyard on a warm summer day.
The juicy tenderness, the smoky flavor, the satisfaction of a perfectly cooked rib—it’s a true culinary delight that, until now, might have seemed like the exclusive domain of professional pitmasters.
But fear not, because today we will demystify the process and show you how to smoke ribs at home like a pro.
Everything you Need to Prepare for Smoking Ribs
- Ribs: Baby back ribs or St. Louis-style spare ribs are great options for beginners. Baby back ribs are leaner and cook relatively quickly, while St. Louis-style spare ribs have more fat and connective tissue, resulting in a richer flavor.
- Smoker or Grill…or Oven.
- Wood chips or chunks: Fruit woods, such as apple, cherry, peach, and pear, are popular choices for smoking due to their mild and sweet flavors.
- Knife or kitchen shears: For trimming excess fat and removing the membrane.
- Thermometer: It’s recommended to use an instant-read meat thermometer to check the internal temperature of the ribs and ensure they reach the desired doneness.
- Aluminum foil or butcher paper: Useful for wrapping the ribs during the cooking process, if desired.
- Dry rub
- Sesame
- Barbecue sauce
- Yellow mustard
- Honey
- Butter
How to Smoke Ribs Step by Step
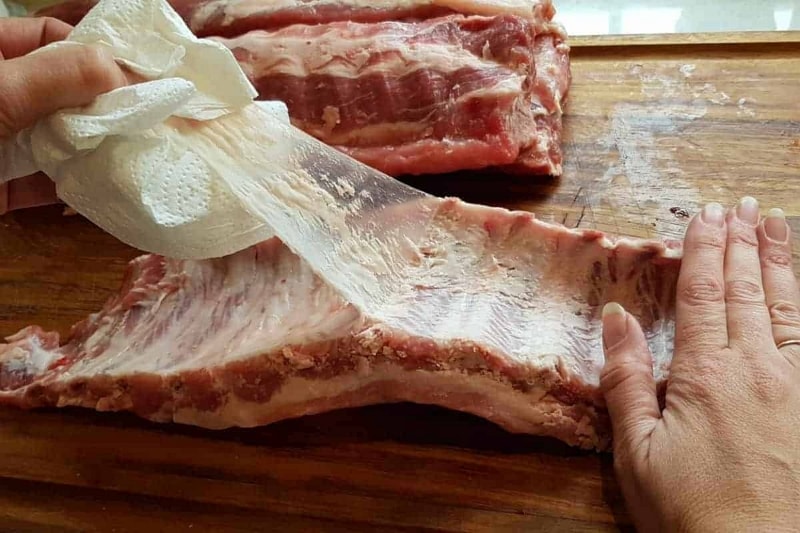
1. Remove the membrane
When smoking ribs, it is generally recommended to remove the membrane, also known as silver skin, from the bone side of the rack.
The membrane is a tough, chewy layer that can hinder the absorption of flavors and spices into the meat, as well as prevent the meat from becoming tender during the smoking process. Removing it allows for better seasoning penetration and results in more tender and flavorful ribs.
Here’s a step-by-step guide on how to remove the membrane from the ribs:
Step 1. Start by locating the membrane: Place the rack of ribs bone-side up on a cutting board. Look for a thin, shiny layer that covers the bones. This is the membrane you want to remove.
Step 2. Loosen the membrane: Use a butter knife, the tip of a spoon, or your fingers to lift a corner of the membrane from the bone side of the ribs. Gently wiggle and work your way under the membrane to loosen it.
Step 3. Get a good grip: Once you have lifted a small portion of the membrane, grab it with a paper towel or a clean cloth for a better grip. This will help you pull it off more easily.
Step 4. Remove the membrane: With a firm grip on the membrane, start pulling it off the rack of ribs in one smooth motion. It might require some force, as the membrane can be quite stubborn. If it tears or breaks, use the knife or spoon to lift another corner and continue pulling until the entire membrane is removed.
Step 5. Trim any excess fat: After removing the membrane, you may notice patches of excess fat on the bone side of the ribs. Trimming off any excess fat will help promote better smoke penetration and prevent flare-ups during cooking.
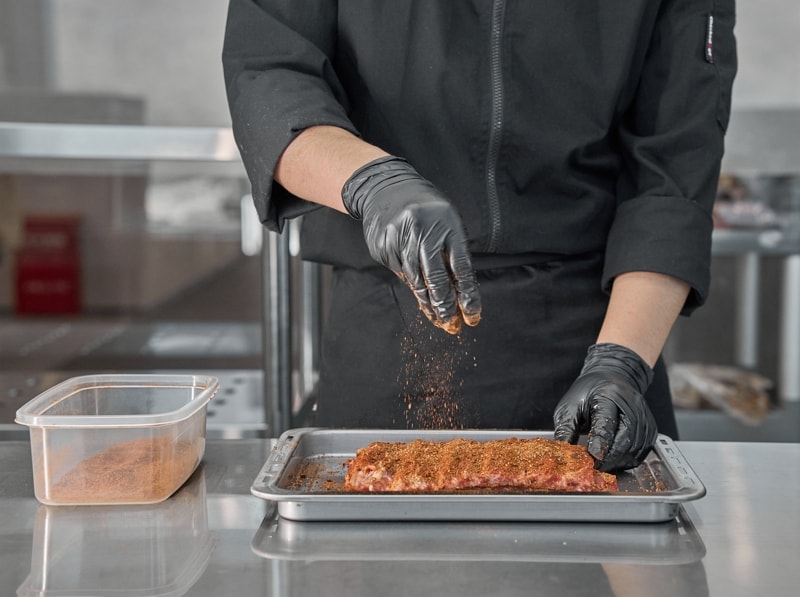
2. Seasoning the ribs
After trimming and drying the ribs, lightly brush a thin layer of oil or spread a thin coating of mustard on both sides of the meat. This will provide a slightly tacky surface for the dry rub to stick to. Keep in mind that the coating of oil or mustard should be very light.
Sprinkle the dry rub mixture evenly over the ribs, allowing it to fall from a higher point. Move your hand or shaker back and forth across the ribs, ensuring that the seasoning is evenly distributed. And then refrigerate for 30 minutes. Do not apply sugar-based sauces at this time.
3. Start to smoke ribs
Step 1. Preheat your smoker to 225°F (107°C), and try to maintain it throughout the cooking process. This temperature range is ideal for low and slow cooking, allowing collagen in connective tissues to break down gradually and fats to render without overcooking the proteins. It helps create a tender and moist result.
Step 2. Soak a few handfuls of fruit wood chips in water for about 30 minutes before smoking. This helps the chips smolder and produce smoke instead of burning quickly.
Step 3. Place a drip pan filled with water under the meat on the smoker grate. This water will help moderate the grill temperature and add moisture to the air as it evaporates.
Step 4. Place the seasoned ribs on the smoker grate, bone-side down. Close the lid and let the smoking process begin.
Step 5. During this time, the ribs will start to dry out slightly, and a crust or bark will develop on the surface.
4. Wrap ribs
When to wrap ribs?
I’m sure you have seen the 3-2-1 rib cooking method, which is widely used and provides a helpful starting point, it’s important to remember that it’s not a rigid set of numbers that must be followed strictly. Cooking times can be influenced by various factors, such as the type of smoker, outdoor temperature, and the thickness of the meat.
The most scientific way to determine when to wrap ribs is by checking the internal temperature with the fastest instant-read meat thermometer InstaProbe rather than relying solely on cooking time. Many pitmasters suggest wrapping the ribs when they reach around 165°F-170°F (74°C-77°C).
How to wrap the ribs?
Step 1. Lay the ribs down on a sheet of foil or butcher paper, bone side up.
Step 2. Place a few pats of butter on the rack to add moisture and flavor.
Step 3. Drizzle about a tablespoon of honey evenly over the ribs.
Step 4. Lightly sprinkle additional dry rub over the ribs to enhance the flavor.
Step 5. Wrap the ribs tightly in the foil or butcher paper, ensuring that it is sealed well to prevent any steam or juices from escaping.
Step 6. Return the wrapped ribs to the smoker. And continue smoking the wrapped ribs for another hour until their internal temperature reaches 195°F to 203°F.
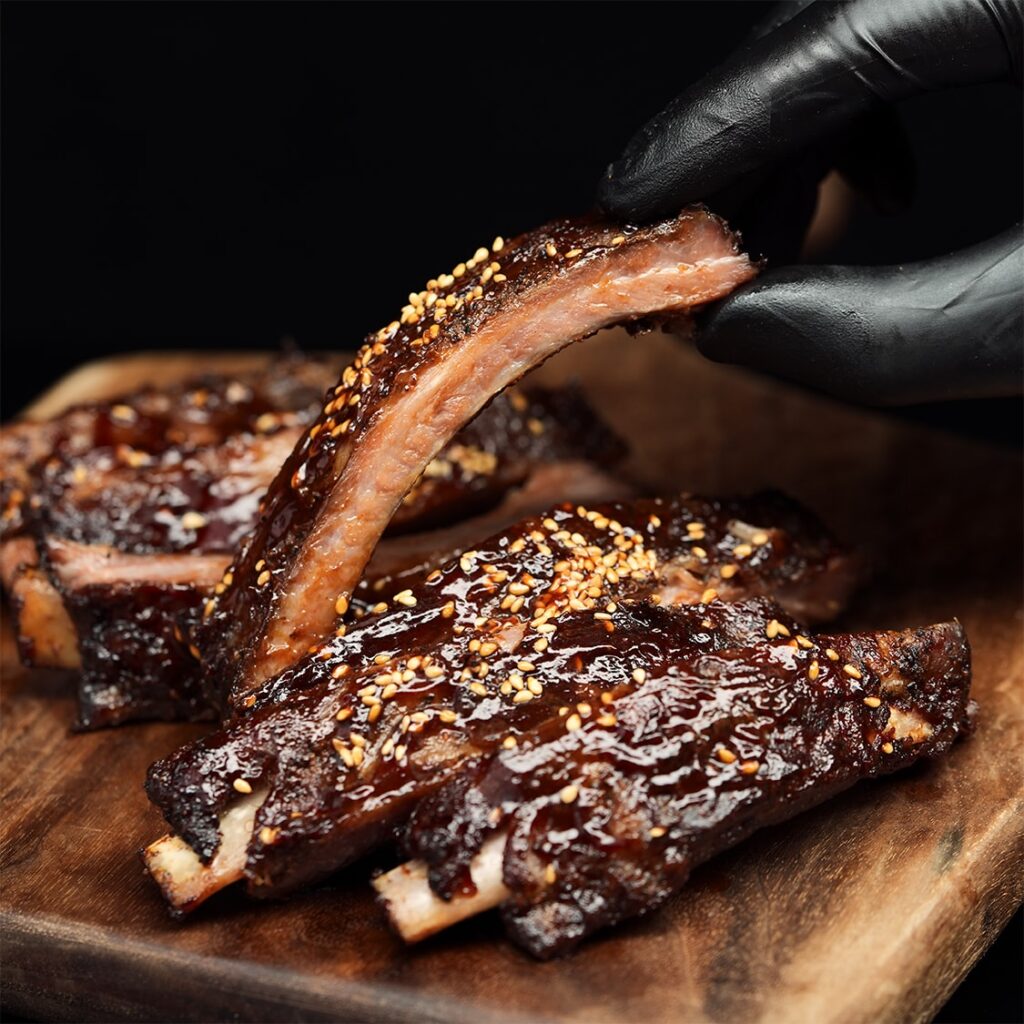
5. Brush Sauce
It’s time to unwrap ribs from the foil or butcher paper, brush a layer of BBQ sauce on the meat side, and sprinkle toasted sesame seeds on top. Continue to cook uncovered for another 15 minutes or so. This will give the sauce a chance to caramelize and develop a rich glaze.
6. Serve
Carefully take the ribs out of the smoker and transfer them to a cutting board or a clean surface. Allow the ribs to rest for at least 10 minutes. This rest period allows the juices to settle back into the meat, resulting in a more succulent and flavorful final product.
Use a sharp knife to cut between the bones, creating individual servings. You can serve them as they are or add additional barbecue sauce or garnishes if desired.
Smoking Ribs Tips for Beginners
Finally, here are a few more tips that will set you up for success in your rib-smoking journey:
- Don’t Over-Smoke: Too much smoke can lead to bitter flavors. You’re aiming for a steady, thin stream of smoke, not a billowing cloud.
- Resist the Urge to Peek: Every time you open your smoker, you’re letting out heat and smoke. Trust the process and let those ribs cook undisturbed.
- Wrap for Extra Tenderness: About two-thirds of the way through cooking, consider wrapping your ribs in foil with a little liquid (like apple juice) for a technique known as the Texas Crutch. This can help keep your ribs moist and tender.
- Test for Doneness: We highly recommend purchasing a reliable digital meat thermometer for smoking and grilling purposes, as the internal temperature is always the most accurate indicator of meat doneness.
- Rest Your Ribs: After they’re done, let your ribs rest for about 10 minutes before cutting into them. This allows the juices to redistribute, resulting in even more flavorful and tender ribs.
FAQs about Smoking Ribs
Q: What is the 3-2-1 rule for smoking ribs?
The 3-2-1 rule is a popular method used for smoking ribs. It provides a general guideline for cooking times and helps achieve tender and flavorful ribs. Here’s what each number in the 3-2-1 rule represents:
- 3 hours: Smoke the ribs uncovered for approximately 3 hours at a consistent temperature of around 225°F (107°C). This allows the smoke to infuse into the meat and develop a flavorful crust or bark on the surface.
- 2 hours: After the initial 3 hours of smoking, remove the ribs from the smoker and tightly wrap them in foil. This helps retain moisture and aids in further tenderizing the meat. Return the wrapped ribs to the smoker and continue cooking for 2 more hours.
- 1 hour: Unwrap the foil from the ribs and place them back in the smoker for the final hour, allowing them to cook uncovered. This step helps firm up the exterior and create a desirable texture while still retaining moisture.
The 3-2-1 rule is a starting point and can be adjusted based on your personal preference and the tenderness you desire. Factors such as the thickness of the ribs, the type of smoker, and your desired level of smokiness may influence cooking times. It’s essential to monitor the ribs throughout the process and make adjustments as needed to achieve your desired results.
Q: How long to smoke ribs at 225?
When smoking ribs at a temperature of 225°F (107°C), the cooking time can vary depending on several factors, including the size of the ribs and personal preferences for tenderness.
It’s crucial to use a meat thermometer to check for doneness. The internal temperature of the ribs should reach around 195°F to 203°F (90°C to 95°C) for well-cooked and tender ribs.
Conclusion
The art of smoking ribs might seem complex, but with this best-smoked ribs recipe, you’re now ready to take on the challenge of smoking ribs at home.
The aroma of the smoke, the sizzle of the ribs, the anticipation of the first bite—it’s a symphony of senses that is deeply rewarding. And when you finally take that first bite of your perfectly smoked rib, you’ll realize that all the time and effort were truly worth it.
So, fire up those smokers, don your apron, and get ready to transform your backyard into your very own rib-smoking haven. Happy smoking, BBQ lovers!